Create and Deploy Your Angular Site in 3 Minutes

Jacob Naryan - Full-Stack Developer
Posted: Fri Mar 31 2023
Last updated: Wed Nov 22 2023
Getting started with your own Angular site has never been easier. In just 3 minutes, you can have a fully functioning website up and running with Netlify. Let’s dive in and take a look at how you can get started quickly!
1. Create a new Netlify Account
The first step is to create a new account on Netlify. Click the “Sign Up” button at the top of their homepage and fill out the form with your name, email address, and password.
Once you have created your account, you will be presented with your dashboard. From here you can see all of your sites and manage them in one place.
2. Click ‘Add New Site’ in the Dashboard
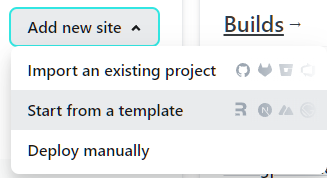
Next, click the “Add new site” button in the middle of your dashboard. This will open a dropdown that will allow you to import an existing project from a hosted repository, start from a template, or deploy manually. Click the ‘Start from a template’ option

3. Select your Template
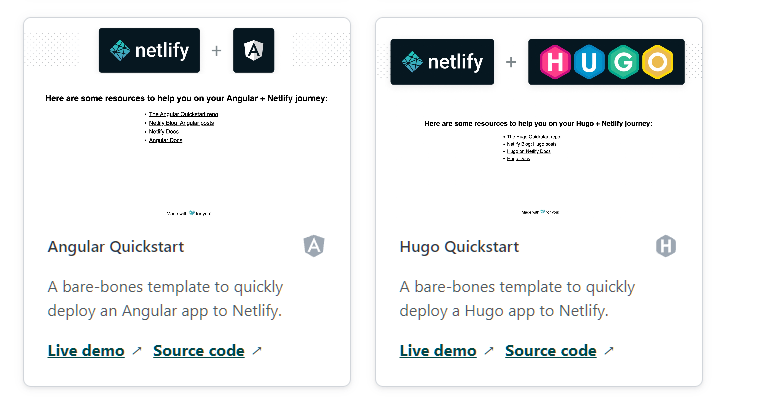
Once you are on the next page, you will see several templates available. Scroll down until you see the one titled “Angular Quickstart”. Select this option.

4. Setup Your Repository
Once you’ve selected your template, it will ask you to clone this repository to your Git provider. Select your provider and fill out the repository details such as name and visibility. Netlify will automatically create the repository for you and add it to your personal Git provider account.

5. Deploy Your Website
Finally, click the “Deploy” button to deploy your site to Netlify’s servers. This process may take a few minutes but once it is complete, your website will be published and ready for visitors!
6. Clone Your Repository
Now that your site is live, clone your repository to your local machine and start building! Any time you commit to your repository Netlify will automatically build and publish your site!
That’s all there is to it! In just three minutes, you can have your own fully functioning Angular website up and running with Netlify!
Thank you for reading. If you liked this blog check out more tutorials about software engineering here.
** I am not sponsored by Netlify I just really like their products.
